There are a few rough rules for setting up bindings angles, but at the end of the day everyone has their own preferences, and it pretty much just a trial and error process to find out what works best for you.
Bindings are set up in a unofficial style that is written as (front foot, back foot).
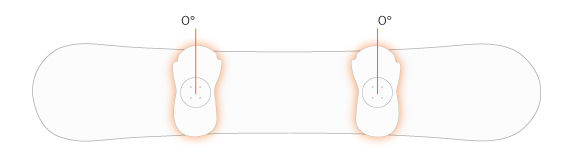
As a starting point the image below shows bindings that are set to 0 and 0. These examples are for a regular rider, where the front foot is the left binding. If you are a goof rider, just reverse everything.
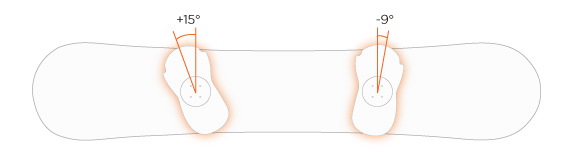
For example if you right +15 and -9 your setup will look like the picture below. This is a fairly common starting point for most riders, and I know that a lot of rental shops will set up beginners on angles similar to this. If this is your first time setting up bindings, start with these angles.
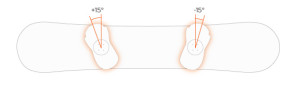
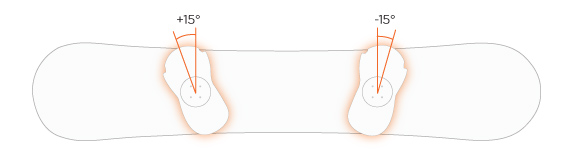
Fairly common with people who ride a lot of park, this setup can be called a duck or ducked stance. Each of the bindings has the same angle, so there is no difference in the angles whether you are riding regular or switch.
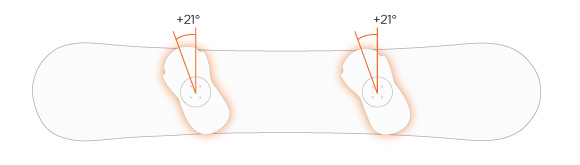
One of the more extreme angle setups, that you won’t see very often is riders who have both bindings set to a positive angle. Mostly used by alpine carvers with stiff boots (and a very different setup).
Almost all binding manufacturers have discs that let you adjust the bindings in angles of 3 degrees, so your options have to be: 0,3,6,9,12,15,18,21 etc. Burton EST bindings let you choose any angle you want, but I doubt that the majority of riders are going to feel a difference of 1 degree in their binding angle.
Find the best price on the How do you choose binding angles?