To put it simply, quick entry snowboard bindings are designed with the intention that you can spend less time getting in and out of your bindings, and more time riding.
There are a few groups of riders that can benefit from systems like these.
People who have had injuries and struggle with flexibility when bending down.
Parents who are teaching kids and want to get in and out of bindings quickly.
Riders who value convenience, or just like new and different things.
The goal for all of these boot/bindings systems is to give you all the performance (when riding) that you would normally get from regular strap bindings, but with the ability to quickly get in and out.
Assuming that you get all the comfort from the boots you need, with all the response from the bindings, then there should be no reason not to consider a quicker system.
what are the two main groups of quick entry snowboard bindings?
There are two main groups of quick entry bindings:
- Setups that need a specific boot and binding combination – like Burton Step On and K2 Clicker
- Setups that can use any brand boot, with a quick or rear entry binding such as Flow, Nidecker Supermatic or GNU.
In the first group, once you enter the system, you are locked into choosing the compatible options. For example, if you buy a K2 Clicker boot, it is only going to work with a K2 Clicker bindings.
The same thing applies to the Burton Step-On system. Because it has ended up so popular, there are a wide variety of boot and binding options, that they license to brands like DC, Nitro and Flux.
Burton Step On
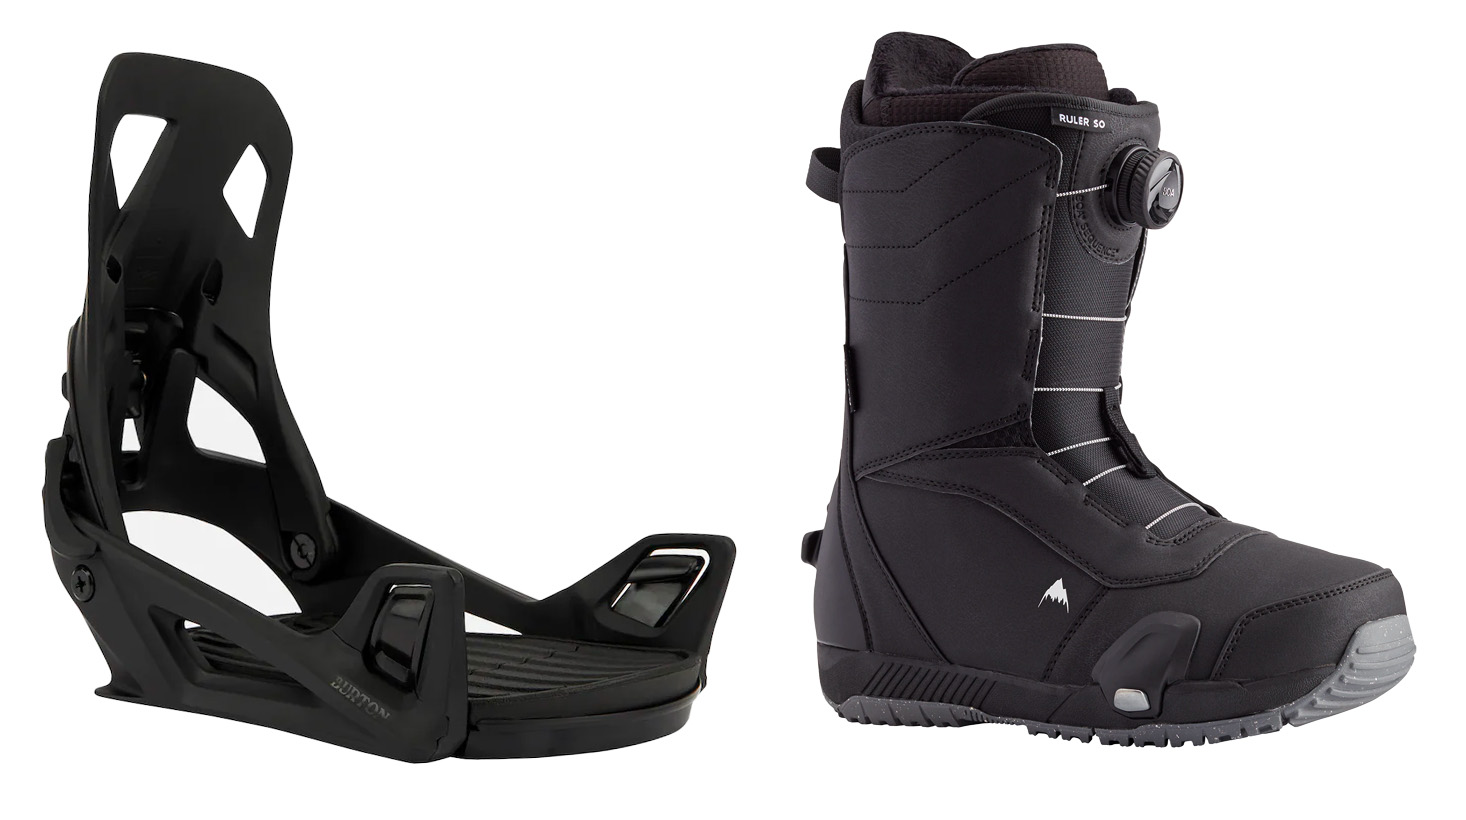
The Step On system is by far the most popular of all the quick entry options. The bindings look pretty normal, the only thing that sets them apart is the lack of ankle and toe straps. It still has a regular highback, as well as two smaller raised connections at the front of the binding.
On each boot, there are three “cleats”. One big plastic one on the heel of the boot, and two metal ones up at the forefoot of the boot.
It might seem a little unnatural at first, but to connect the boots to the bindings, you click the heel cleat in first, then the toes after that. Once you have clicked in, you are good to ride. When you need to get out, you pull a lever on the outside of the binding. That releases the heel cleat, and you can “walk” out of the bindings, which lets the toe cleats release the boot.
Being the most popular system, there are quite a lot of boot and binding combinations that you can choose from.
Options for Step-On boots
Mens Step-On Boots
- Burton Ruler
- Burton Swath
- Burton Swath Sweetspot
- Burton Photon
- Burton Photon Soft
- Burton Kendo
- Burton Ion
- DC Control
- DC Judge
- Nitro Profile
Mens Step-On Bindings
- Step-On (regular)
- Loback
- X
- Genesis
- Flux
- Mine 77 EST
There are also kids
Womens Step-On Boots
- Burton Limelight
- Burton Ritual
- Burton Ritual Sweetspot
- Burton Felix
- Burton Felix Soft
- DC Mora
- Nitro Cave
Womens Step-On Bindings
Pros
- Fast and easy to get in and out
- Lots of boot options from multiple brands
- Enough binding options
- More options every season
Cons
- Locked into the Step-On system
- Expensive
The speed and convenience is there with the Step-On system. With the selection of compatible boots out there, getting a comfortable boot that can still perform shouldn’t be an issue. If you are willing to pay the premium for the speed, the downsides are minimal. Almost no adjustments on the bindings (though there is still forward lean adjustment), which I think is a positive. There is no fine tuning to get it all working smoothly, it works straight away with nothing to get wrong. Click here for my review of my personal Step-On setup.
K2 Clicker
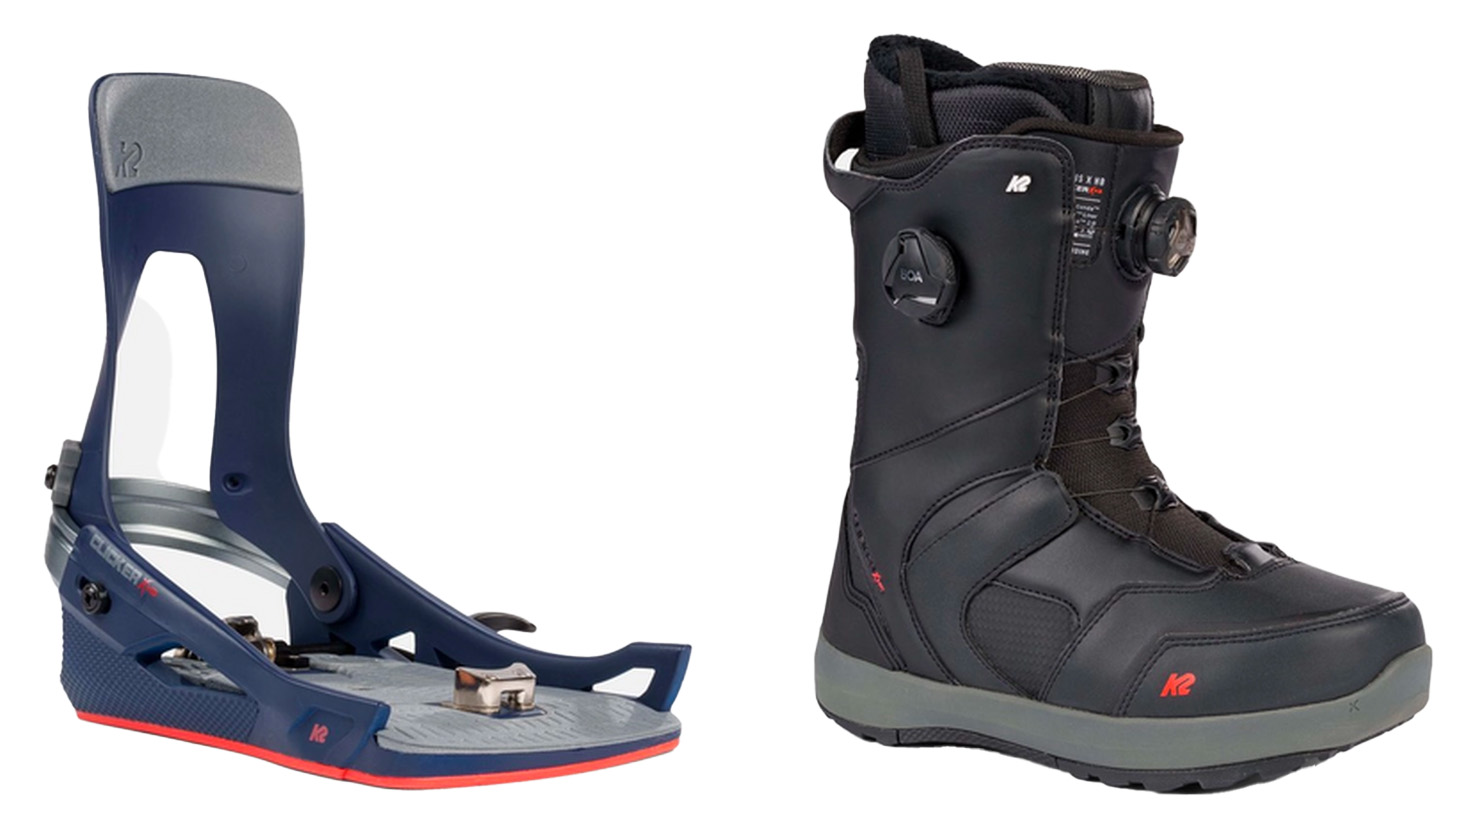
Closer to the older style of Step-In bindings, these have a aluminium connections for the toe and heel. The bindings still have a regular highback, with canting on the chassis, and forward lean adjustment.
There are 5 models of boots, with one binding for men and one for women. I haven’t run into these in real life yet, but you can read more about them here.
Flow
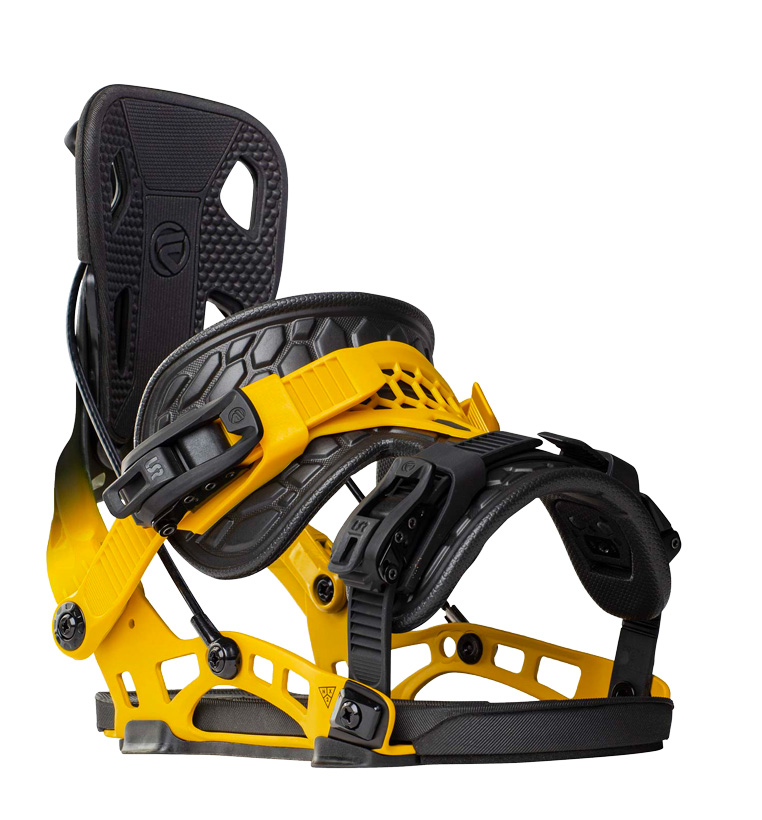
When people talk about rear entry bindings, Flow binding are what come to mind first. These are rear-entry bindings, which means that the highback folds down. This lets you kick your boot in, the pull the highback up and lock it in place to ride.
A big advantage of the Flow design is that you can use them with your regular snowboard boots.
Getting the adjustment right is the hardest part. You need them loose enough that you can kick your boot all the way in, while still having them tight enough that they are still responsive enough to ride. The balance can be found, but it does get a little trickier when there is more snow on your boots and bindings.
Of course you can make all the fine adjustments you need with the ankle and toe ratchets, but as soon as you have to bend over and fiddle with them to get a tight fit, you have lost the advantage of their speed.
There are plenty of die-hard Flow fans, who love them once they get the adjustments right.
Pros
- Use any boots
- Wide variety of models from entry level to aggressive
Cons
- Hard to adjust
Read more about Flow bindings.
Nidecker Supermatic
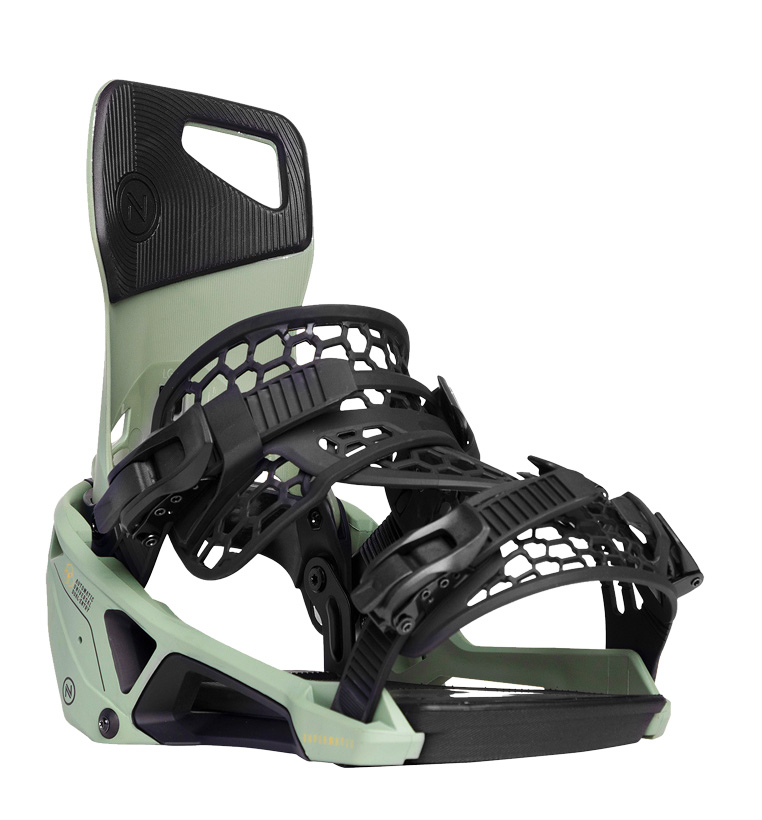
The Supermatics are along the lines of the Flow bindings (both owned by Nidecker), with the giant difference being that the high back self closes once the boot in the bindings.
If you are in any situation where you can’t, or don’t want to use the quick entry or exit, you can treat them like regular bindings. Get in an out like normal, with the ankle and toe ratchets.
Pros
- Work with all boots
- Quick entry or regular style
Cons
- Difficult to find
Clew
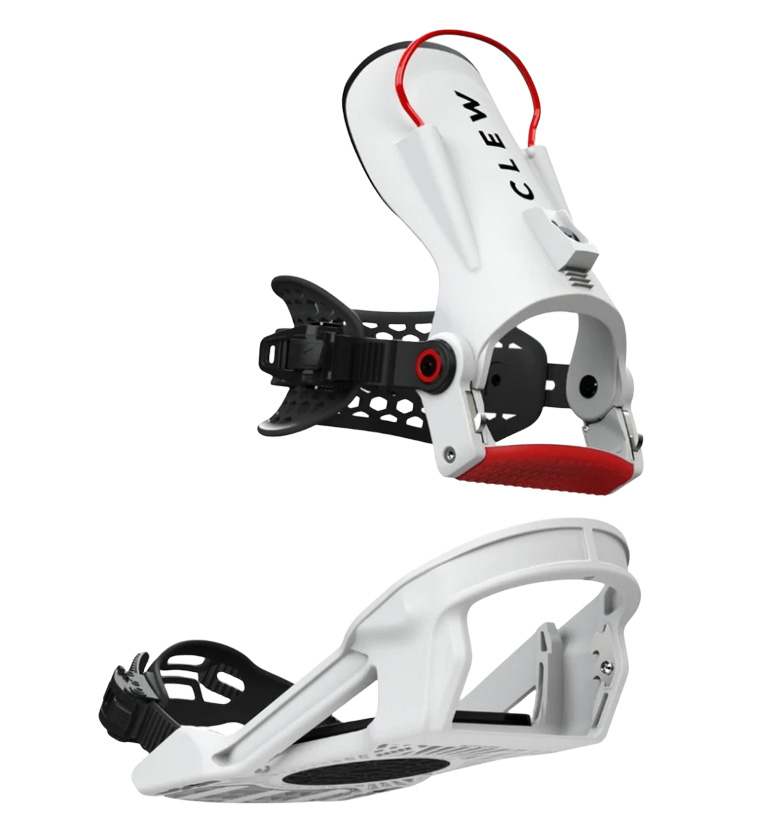
The Clew binding has a unique design, by separating the binding into two parts.
You can wear your normal boots with these bindings, put your boot in like normal and tighten the ankle and toe straps. Once you want to get out, you can pull on the big red handle and step out.
That releases the highback and ankle strap, and leaves them connected on your boot so you can get on the lift. Once you are at the top, put your boot under the toe strap, and push your heel down to lock it back together.
I have only seen these in real life a couple of times, but haven’t tried them out on snow. From the quick look, the straps and ratchets seemed quite nice, and there was a satisfying and solid click when you connect both parts of the binding.
GNU
These have been around for quite a while, and the same chassis seems to be used for a few brands. The work in a similar way to Flow bindings.
It solves one of the tougher problems that the Flow bindings have. When the highback is folded down, it automatically pops the ankle strap up a little, giving you more room to get the boot in properly.
Then, you can pull the highback up and lock it in position, but you also need to push the ankle strap back and lock it into its tight position before you ride.
I am not a fan of these, they are very difficult to fix when they come in to be repaired, with very unique parts.
Have a look at the GNU bindings
I can’t reach the hiback when I want to close flow bindings.
So I guess the same problem I will have with Burton and Supermatics when I have to reach some lever.
As I see it, only CLEW are “reachable” for me.
I have seen some weird looking wire stick things that people have for Burton Step Ons. Basically it seems like that brake cable on a bike, with a big thing on the end to make it easy to grab. You could have a search for “Burton step on release extension”, a few people have come up with some interesting ideas.