Nidecker Supermatic are quick entry bindings, that are compatible with all brands of snowboard boots. Rather than strapping in and ratcheting the ankle and toe strap at the top of every run, you can just kick your boot in the Supermatics and start riding.
If you don’t want to read the whole review, they work well, are smooth and easy to get in and out but are noticably heavier than other bindings.
Who are the Nidecker Supermatic for?
Step On’s have proven that there are lots of people who want some kind of quick-entry bindings. That could be for a whole lot of reasons, but people who have had injuries and aren’t as flexible would be one of the targets.
There are plenty of old-school people who instantly have a problem with anything quick-entry, but at the end of the day if you get more laps in, more time snowboarding then it surely is a plus.
Plus, some people just want new stuff that makes things quick and easy.
How do the Nidecker Supermatic work
The bindings have an open (highback folded down) position, when they are ready to have a boot put in, or have just had it taken out. To get the bindings open and the highback down, you need to push the inner lever down.
This sort of releases the locking mechanism, so while the lever is down you need to pull the heel of the boot up to fold down the highback, open up the straps and let the boot out freely.
Getting into the bindings when they are in the open position is easy. Just kick your boot in, and push your heel down to lock the highback in place.
It sounds like two steps, but after a couple of tries, it is just one easy movement.
The three things that make these work well are the slippery toe section, the roller at the bottom of the highback and the large opening area of the strap when the binding is open.
When you need to get completely out of the bindings, you will need to push the lever on one binding by hand to release one boot. Nidecker say not to, but I used my free boot to push the lever on the other binding.
How the Nidecker Supermatics Ride
Setup used
Board: Never Summer Valhalla
Boots: Nitro Team Pro
I don’t have any complaints of how the Supermatics ride.
After a couple of runs I was able to smoothly get my boots into the bindings while riding the down ramp from getting off the lift. In theory, you could just lap all day without stopping if you weren’t riding with people who had regular setups.
The only thing that would occasionally happen when I was skating or getting off a lift was that sometimes I would accidentaly knock/kick the highback into the upright position, where it locked itself in place. It wasn’t a real problem, but it meant that I had to reach down to unlock the bindings to get the boot in – and I preferred when it stayed open and I could just kick the boot in and ride.
The performance of the Supermatics is good. They had a medium/stiff flex, which is what I like to ride in regular bindings. They were nice and responsive, but not too stiff.
With so many moving parts, the Supermatics are chunky and noticably heavier than other bindings. It doesn’t seem like a big deal at the start of the day, but the extra weight does slowly add up.
I guess that the extra weight is the price that you have to pay to have the convenience of quick entry, as well as the ability to use whatever boots you already own.
I am undecided on whether the extra weight it worth the convenience. If they had the weight of a regular binding, then it would be a no brainer – I would definitely use them.
Setting them up
From my experience with Flow bindings, I did think that it was going to be a pain to get the Supermatics adjusted and working properly with my boots.
Luckily, it turned out to be a smoother process than I thought.
First, I loosened the three clips on the inner of the binding to let the whole Hybrid Strap move around fairly freely. Some of the clips lock in pretty tightly, so you might need a screwdriver or something to get a little extra leverage.
Then, you can wiggle the strap around to center it on your boot, lock the 3 clips in place and give the two ratchets an extra click or two.
After that it was just a bit of testing taking the boot in and out of the binding, making sure that I could easily get in and out, while also being tight enough against the straps when it was in and locked down. I got it as good as I thought I could, but did expect to have to fiddle around with it a bit when I did get it on snow.
After that I mounted them on the board, then made the standard disk adjustments to center the toe and heel of the boots on the board.
When I was on snow, I was able to ratchet the straps a couple of clicks more than I thought, which makes sense as it is much easier to push your boots in and out while wearing them compared to doing it by hand.
Compatibility
It is pretty standard these days for bindings to be able to be mounted on standard 4×4 boards as well as Burton Channel boards.
The discs that come with the Supermatics are comptible with the normal 4×4, channel boards as well as the old 3d Burton pattern. Not a big deal overall, but good for those riders who are still hanging on to some old boards.
Pros and Cons compared to other systems
Flow bindings
You could pretty much call Flow bindings the predecessor to the Supermatics. Good idea, but they are a bit tougher to adjust and get working smoothly.
When the highback of Flow bindings are folded down, you need enough room under the straps to quickly and smoothly get your foot in, lock the highback and ride.
The balance is that you need the straps tight enough to have a responsive ride, which also makes them hard to get slide the boot in. If you have to sit around and adjust the straps, then you might as well be on a regular set of bindings.
Some of the higher end Flow bindings do have the shiny/slioppery toe and pivot a little to open like the Supermatics, but they aren’t as easy to get right.
For some reason the hardcore Flow riders think that this system can’t be beaten, and good luck trying to convince them otherwise.
For me, there isn’t enough of a convenice upgrade with Flows to make them more attractive than regular strap bindings.
Flows have pretty standard pricing, so they are quite comparable to regular bindings.
Pros
- Quick entry
- Regular weight
- Compatible with any boots
Cons
- Hard to adjust
Burton Step On
The Burton Step on system is a lighter and simpler system overall. They use 3 cleats on the boot to connect it to the binding – two on the toes and one on the heel.
With this setup you need to use the specially designed Step On boots – so you need to make the full jump – buy their boots and bindings.
Pros
- Lightweight
- Simple – minimal moving parts
- Multiple binding options
Cons
- Locks you into their system
- Slight price jump compared to regular equipment
Nidecker Supermatics
Pros
- Works with all boots/brands
- Adjust them once and don’t touch it again
- Solid medium-stiff flex
Cons
- Heavy
- Expensive
Although the flex of the Supermatics is going to be enough for most riders, new this season are some even stiffer carbon Supermatics.
Sizing guide for Supermatics
The Supermatics have a more unisex size guide compared to other bindings, and while I think it is a system that makes more sense overall, you will want to make sure the exact size binding you would need. In general if you normally ride a Medium binding, you probably will have to ride Large Supermatics.
| US Youth & Men’s | US Women’s | EU | UK | Japan / Mondo | |
| S | 4.0 – 5.5 | 5.5 – 7.0 | 35.5 – 37.5 | 3.0 – 4.5 | 22.0 – 23.5 |
| M | 5.5 – 8.0 | 7.0 – 9.5 | 37.5 – 41.0 | 4.5 – 7.0 | 23.5 – 26.0 |
| L | 8.5 – 10.5 | 10+ | 41.5 – 44.0 | 7.5 – 9.5 | 26.5 – 28.5 |
| XL | 11.0 – 15.0 | – | 44.5 – 49.5 | 10.0 – 14.0 | 29.0 – 32.5 |
Features of the Nidecker Supermatic
Medium-Stiff Flex
Nylon + Auto Baseplate
Nylon + Ultraback Hiback
Exo-Frame Hybrid Strap
Hexo Toecap
Locking Slap Ratchets
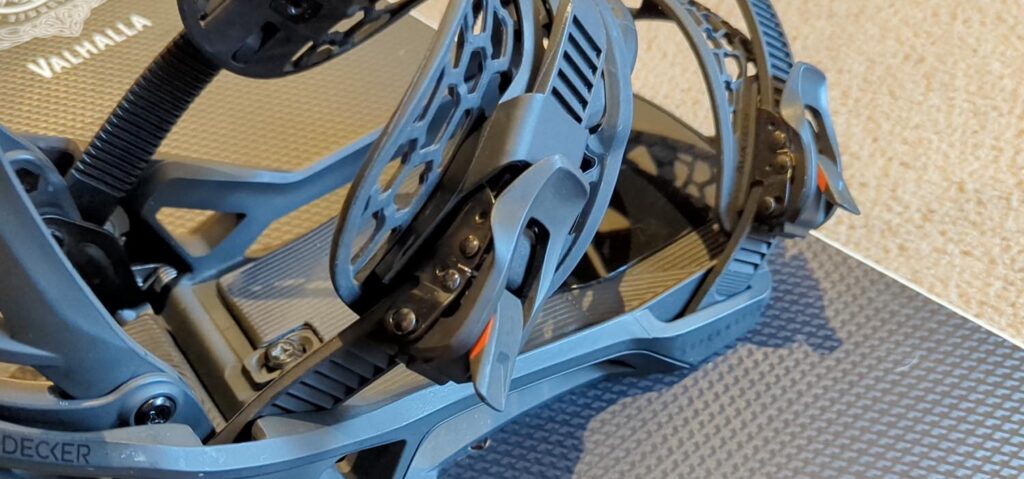
Ratchets that can be locked in place once you have set everything up for the size of your boots.
Auxtech
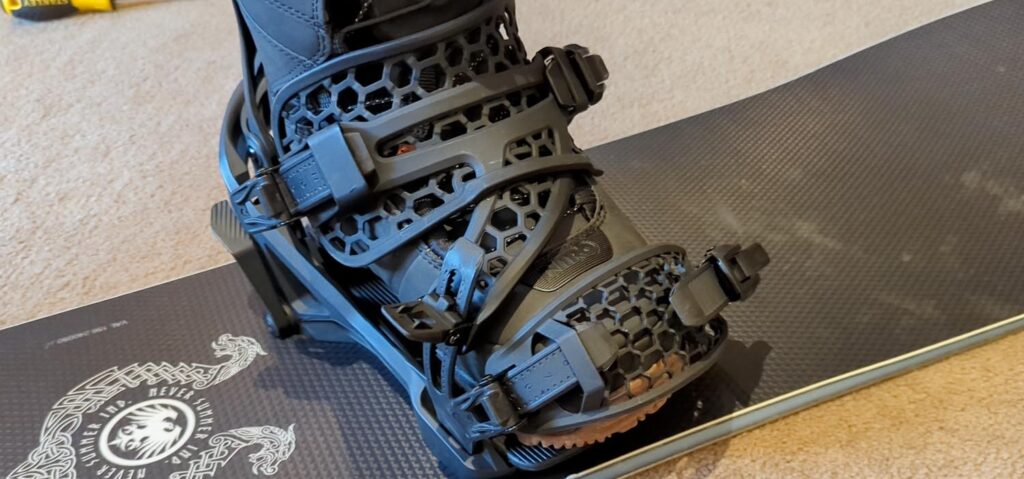
This is mainly talking about the shape or pattern on the toe strap. As it tightens, the it expands neatly around the toe of the boot.
Multi-Disc
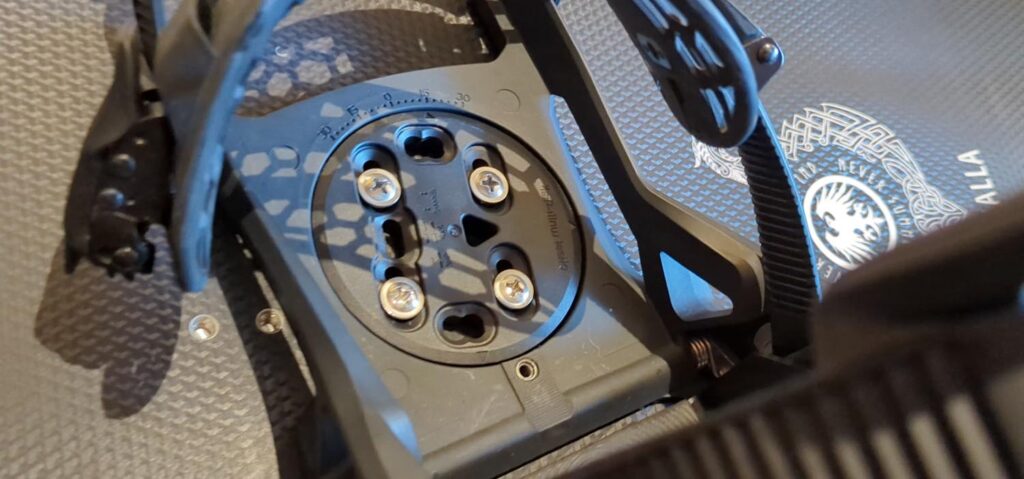
Compatible with regular 4×4/4×2 boards, as well as Burton Channel and Burton 3D patterns.
Bankbeds
The footbeds of the bindings have a 2.5 degree angle (canting), to hopefully better align your ankles and knees.
Slip-N-Grip
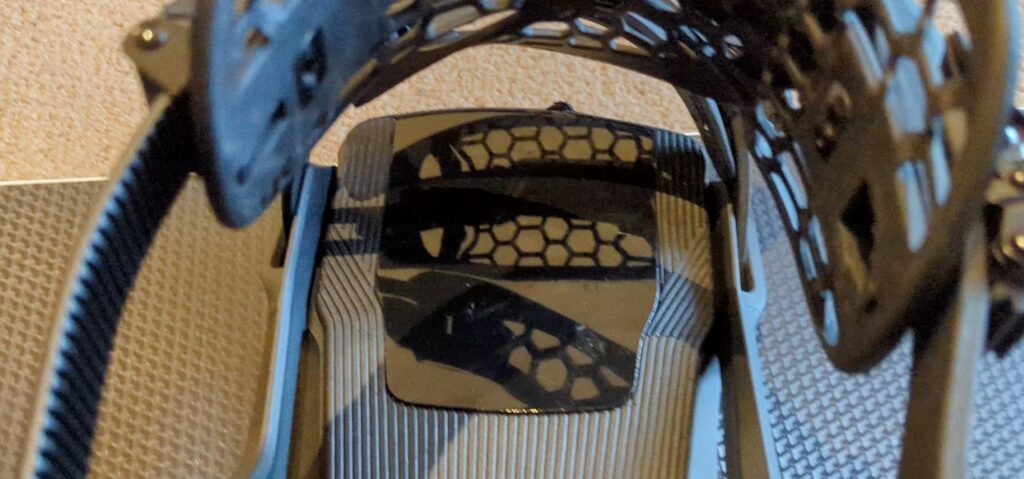
This is the slippery and shiny front section of the footbed, that is made to help slide the toe of the boot in easier.
Quick-Set Latches
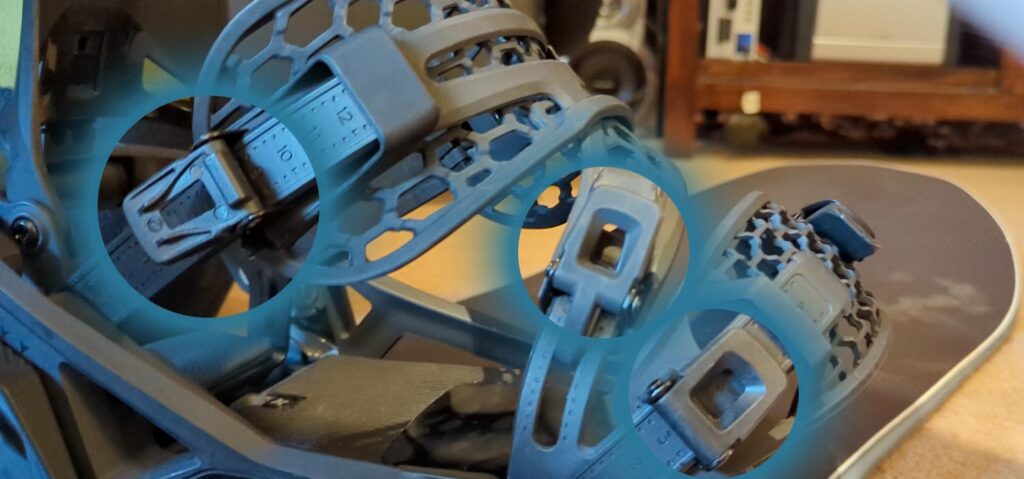
These are the flip style latches to control the position of the straps, so if you need to you can adjust the strap without needing any tools. Compared to most other bindings, these lock in very securely, so you might have to put in a fair bit of effort to get them to release.
Forward Lean
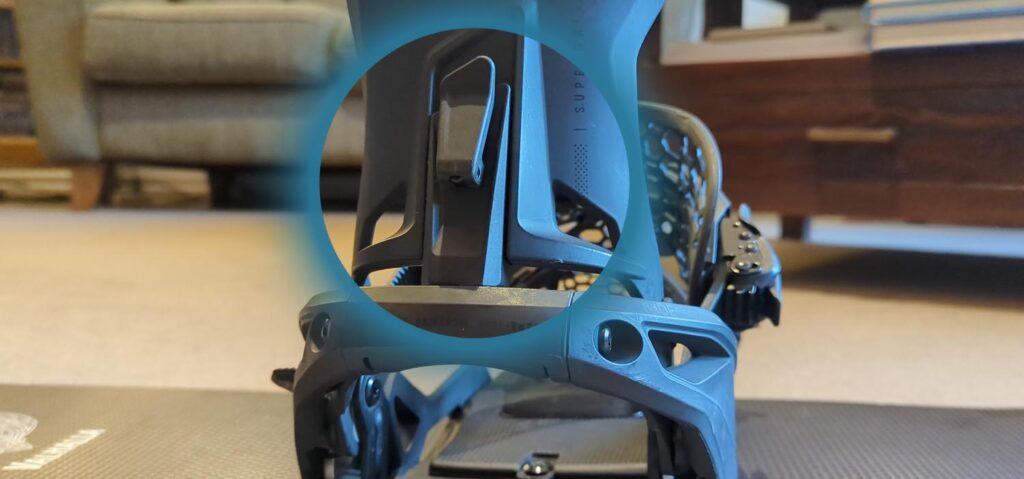
Forward lean adjuster just like on regular bindings.
Find the best price on the Nidecker Supermatic